
Final Designs:
After I got the ‘results’ from my peers on what Final Design best suited the personality traits for the character, I got onto making the different viewpoints of the character to help in modelling them afterwards. This is the result of the viewpoints:


The images above are the process of me drawing out the different views of my character as it will help a lot for me to sculpt it out in the programme Blender. After sculpting the character (which adds detail to the character), I will move onto texturing him (this will show the viewer what material each piece of armour is made of and show an increased level of detail of the character) and then posing it to fit the different stances that I came up with before in my ideas phase. I found that the drawing phase of my production was fun for me, as I like to draw anyway, but I had previously never really tried to draw side views or the back views before, so this challenged me to visualise and draw the character at different angles (side and back views). This in turn has developed my skills in drawing and designing characters from different angles.


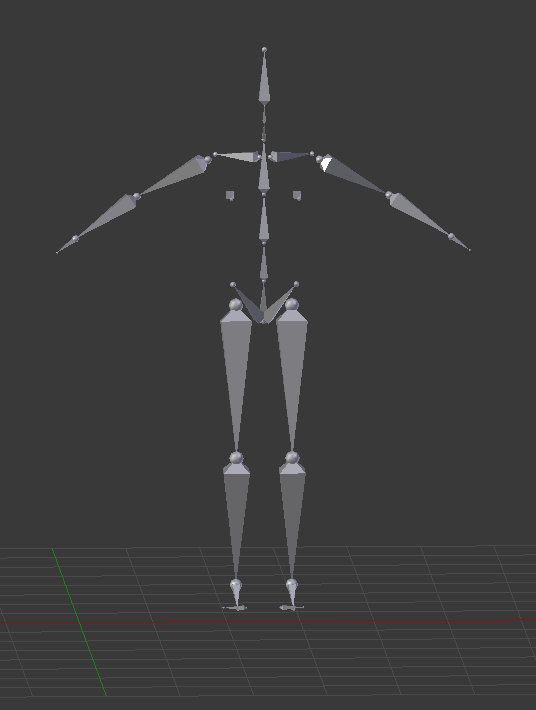
The way in which I sculpted my character was done by selecting my character and pitting it onto edit mode in Blender. This allows me to see and edit all the vertices, edges and faces of the character.
When I first started sculpting, I noticed that the model had a mirror modifier on it so that anything I changed on one side would be mirrored to the other. This was a problem as this would have created issues with how the character looked compared to the drawings I created. So I deleted the modifier and simply coped and pasted the remaining side and mirrored it to fit as the other side.
Before I started sculpting I put my drawings in as images and set them to be viewed from a specific angle only which would allow me to see if the sculpting and scaling of the character would match the drawings. This in turn became an important reference image for me as I was sculpting the character. I then went ahead and moved onto scaling the different parts/limbs of the character to be similar to, if not exactly like, my drawings. I did have a trouble at first in getting certain faces and parts of each limb to scale to the desired look, but I managed to create new faces by dividing the selected faces and then continuing to sculpt. This in turn allowed me to make more detailed parts of the armour such as the straps. the rim and metallic texturing of the armour for the character.
For now this is the final modelling product. From here I will be doing the texturing part of the character process. I did have a bit of trouble with the modelling process as I thought of the idea of disassembling the limbs and doing the sculpting individually, but this caused the problem of having to reattach the limbs with thing not properly attaching as well as the vertices, lines or faces appearing through the finished sculpt of the limb. In the end I did fix most of these issues and I decided that as long as they aren’t appearing through all of the model then it wouldn’t be problematic overall.
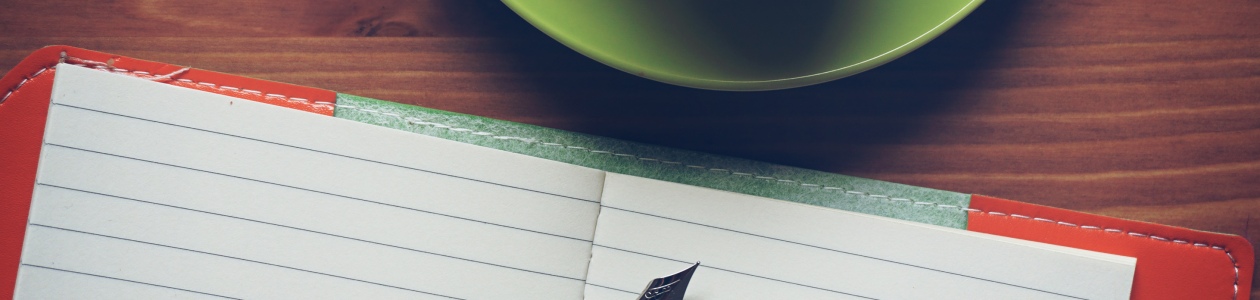
I will be trying out the method of ambient occlusion as through my tutorial with a tutor I realised that within the time frame this would be the best course of action. This shows what will be visible if light is surrounding the character, giving me an idea of what to focus on when texturing the character. The way this works is to go into the lighting setting tab and scroll down to the ambient occlusion. I then ‘bake’ the character which will allow me to see what faces of the character will be more visible to the viewer and therefore show me what specific parts of the character I should focus on texturing.


The images above show the process I went through getting the model unwrapped for the UV Map for textures and at the same time baking the ambient occlusion to the character model. I had a problem with the UV map and ambient occlusion bake, as it showed a number of shadows on the visible surfaces that shouldn’t have been there, despite the face being on the surface and supposedly being in the light. I had to invert the faces that had shadow on them as the surfaces were inside out on that particular side -this came about because I had mirrored one side to another, inverting the faces solved the problem.


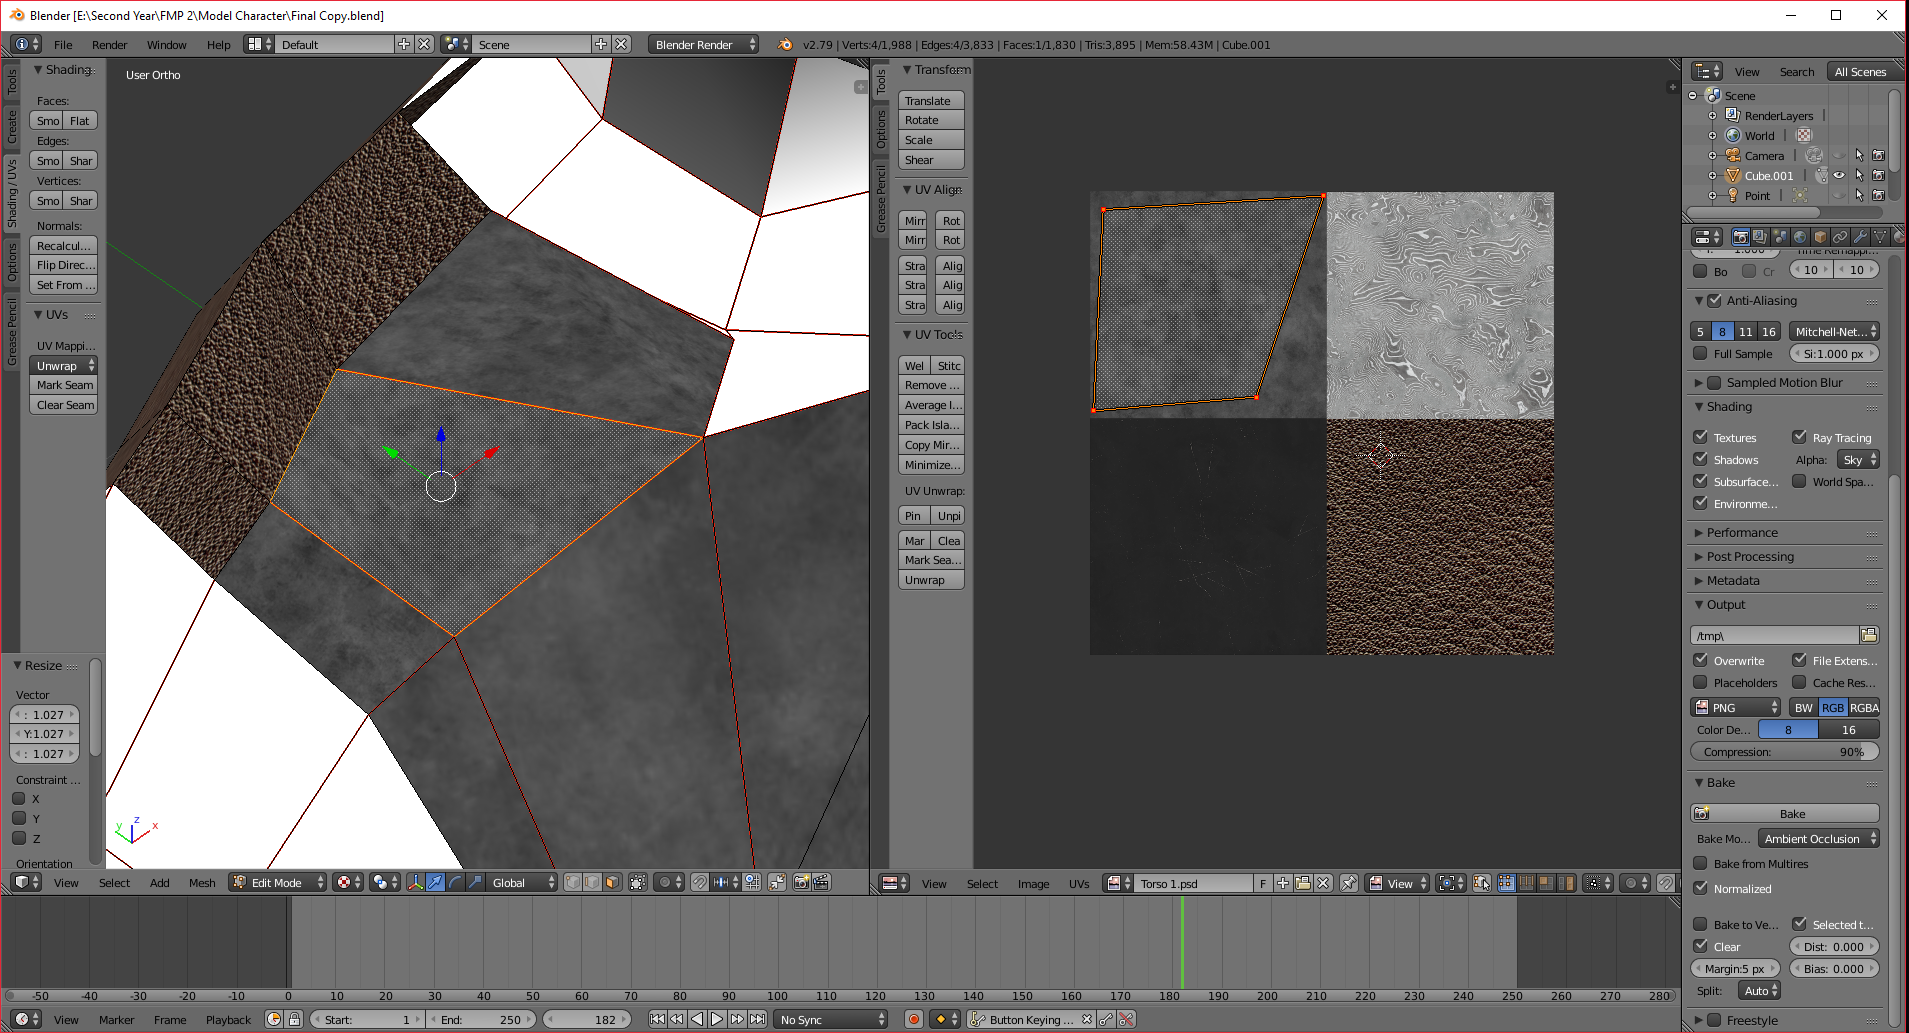
However, after going through the settings and solving the problem I essentially decided that the ambient occlusion wasn’t really necessary for me to use the lighting to texture my character and so I decided to not use it. As seen above, the image shows every single face of the entire character without the ambient occlusion bake. The initial map I had of the entire character would be a problem to texture, as it will require me to put an individual texture on each part of the faces and there are a huge number of faces to work on. So I would then have to choose the individual sections that would get certain textures, such as the right arm texture or the left leg texture. I would then select each limb individually and create a new map for the selected areas, this would allow me to texture the individual pieces rather than having to apply a very large texture map.


As far as the texturing went, it was quite good. I did have a few obstacles such as the texturing not actually being applied when rendered, but I managed to fix this with the help of some instructions from one of my tutors. The problem was that I didn’t apply a new material and new texture to the selected faces as I was texturing them. This was easily fixed by me selecting the limb pieces again, and creating a new material and texture for them then just applying the correct texture file that I had used for each limb. This only took a little bit of time as it wasn’t a big obstacle and it was something I could have done earlier or rather at the start of texturing if I had realised then. However, I did manage to get the character fully textured and the next step is to work on moving onto the posing.
I also need to start figuring out how I want to present my work as this is a vital part of my project. For the moment I aim to have a small video of the camera going around the character to show it off in a specific pose which shows the degree of detail in the character’s armour and design.


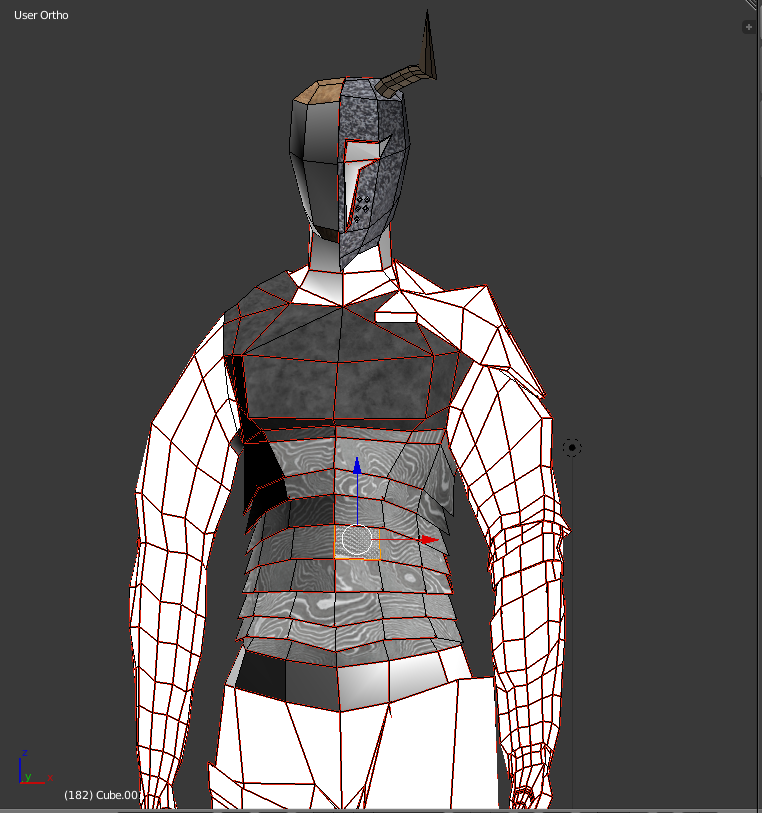
Above are screenshots of the weight painting I had to do before I moved on to posing the character. For each limb segment, I had to change it to be weighted on the section that complimented the skeleton rig (Image above). As the name suggests, I used a brush to paint a specific part of the body to complement the rig, red=weight 1 and blue=weight 0. The part that is red is the moveable part, the yellow part is similar to red but to a lesser extent of movement, and the blue sections don’t move at all. This is to complement the specific bone of the rig’s movement which had to be coloured red while everything else had to be either blue or black, to stop it from moving along with the segment of the moving limb. I had trouble with this as at first I would move one section and others would move at the same time, for example, I moved the right leg and then some of the right arm and torso parts went along with it. This was an inconvenience because it wasn’t what I was trying to achieve so I had to do the weight painting before the posing, which was worth it, as I managed to get the character more easily and effectively into a good pose.
The pose I chose for the character was that of it sitting on a boulder to show that they were calm, but alert and watchful and therefore still ready for battle. This wasn’t one of the original poses that I had come up with in my ideas phase, but because I liked the idea of this pose because of the intended effect instead. I can say that I am happy that I went with this as I think the other poses wouldn’t have had the desired effect that I wanted for my character. However, to get the character into this pose, I had to find a ready made environment to put it in, as I didn’t have the experience and time at this stage to create my own environment from scratch. I did find one pretty easily as I went onto the website blendswap.com to get the environment model. I found a model that I felt was extremely well made, and which was just perfect for my character and its personality.
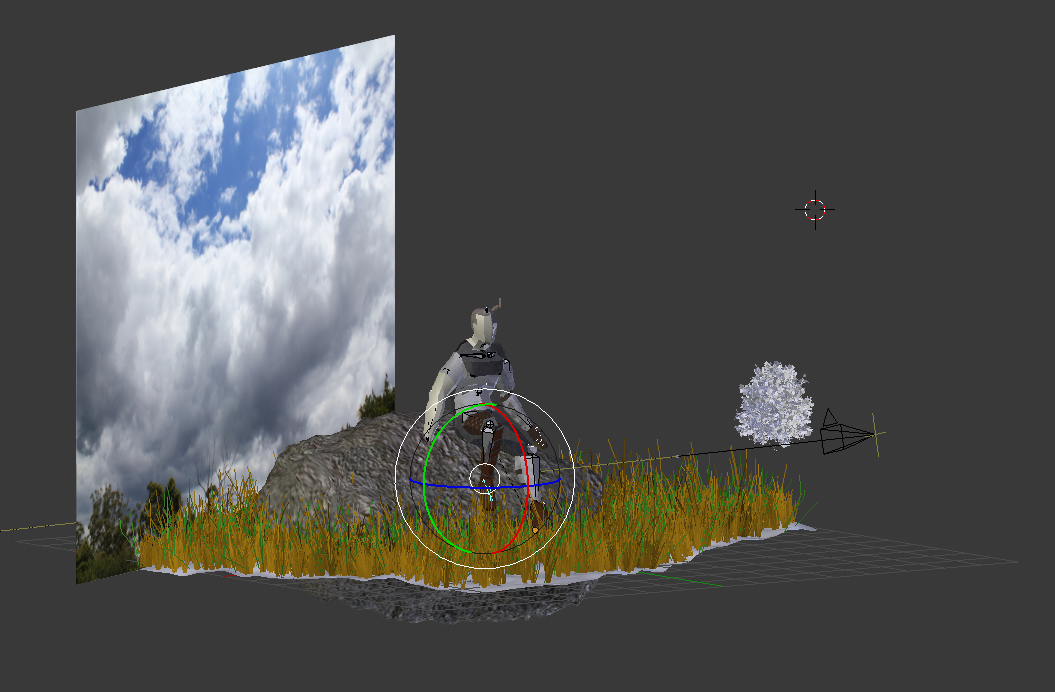
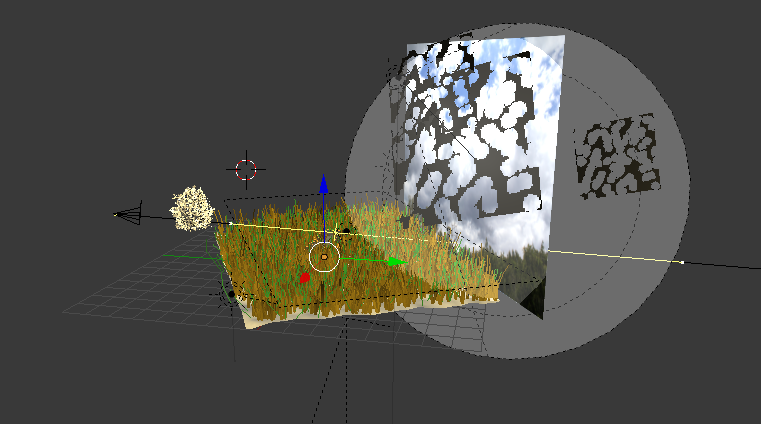
I wanted to find a separate environment model to act as a surround for my model, as I thought it would be pretty bland to have a grey default background for the character, so I deleted the first model’s background and brought in the second model from blendswap as the background. I then worked further on the character’s pose to make it fit in the setting and make it seem like it was naturally sitting on the boulder. The work on weight painting that I had done, helped me bend and flex the limbs, torso and head of the character relatively easily in the end,so while it took a lot of time at the point initially in getting the parts weight painted, it saved time in enabling the character to be posed effectively. Once I completed the posing task, I then worked on the camera work. I decided to have the camera move up and down at different heights in relation to the character and show it off at different angles as it went around. I thought that this would show more of the character to the viewer and give them a better experience of the character, than to have it go around in a circle at one level. To do this, I had to key frame the specific locations and angles in which the camera would be facing the character, then the programme would auto move the camera to go to the next key location and angle I had set. This would create a clip of the camera view going around the character from different angles. After I had done this, I went on to render out the clip as single images. This was a better option because if I had rendered it out as an animation and it stopped for one reason or another, it would have corrupted the video file and which wouldn’t have been useful. Another reason I rendered it as images was because if it did stop for any reason I could got to the last frame that it stopped at and continue the render from there.

Above is the initial import of the video to Adobe Premiere. This gave me a basic idea of how long it would be when it got exported out as a video. The timing of this ended up at 13 seconds long. I felt like this would be good as it is a quick but simple way to show off the character, with some of the texturing detail visible and for the audience/viewer to see the character in full and from a variety of angles.


While I was in Adobe Premiere, I had the idea to add on some ambient sounds, as I thought this would enhance the video by adding mood and tone for the audience hear as they view the video. I added some effects to both the sound and visuals. With the ambient sounds I modified the sound of it so that it would fit the time frame of the clip, and not be too loud and therefore distract from the character. I moved onto getting the visual effects from the effects tab under Visual Transmission. This is essentially where I got the dip to black effect from and then applied it to the beginning and end, and the sound fades in at the beginning and out at the end of the clip to match the visuals.

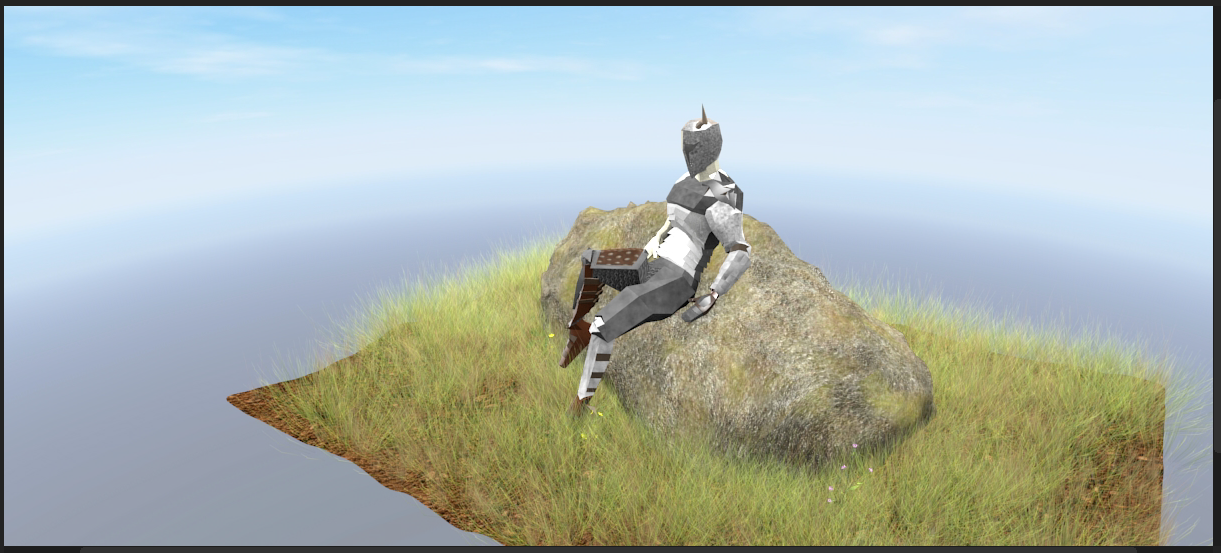
This is a glimpse of what the final video will look like when rendered as I have rendered it out to be the highest quality I can get it. This will allow the audience to view it better and to be able to see all of the detail that of the character, while still being able to see the great environment around it.
The full video is below:
As a final thought I feel that the audio could have been a bit louder than it is in the video so the audience can actually hear it and understand how the ambient sound reflects what the environment is like around the character.
After I talking with a tutor, I decided to add on a title and credits to show the title of the video and who had made it. While I initially thought it could be clearly seen, since the display board would show my name and the screenshots around it, the credits make it clear for the audience. I chose to have crisp, clear, slightly cursive white writing on a black background to make it simple and easy to read.


Above are a couple of close ups of my character. This is to show how much detail wen t into the character’s build and the texturing of it. I feel that I can take this further with my knowledge of previous projects, such as making the textures have a more 3D look to them. However, I feel that for this project that this is still very good for my character and I am wanting to take it further in my spare time after the Final Major Project.
